9 Best Telescopes for Visual Astronomy (November 2026)
The best telescopes for visual astronomy include the Gskyer Telescope for portable backyard observing, the MEEZAA Telescope for brighter beginner views, and the DWARFLAB Dwarf Mini Smart Telescope for app-guided observing.
On this page (7 sections)
- Which telescopes are best for visual astronomy?
- The best telescopes for visual astronomy
- What aperture do you need for backyard astronomy?
- How should you choose a telescope mount?
- Can you see galaxies with a home telescope?
- How do you set up a telescope for visual observing?
- Best telescope for visual astronomy: the final choice
The best telescope for visual astronomy for most beginners is the Gskyer Telescope. Its 70mm refractor, manual altazimuth mount, carry bag and phone adapter make it a practical choice for direct eyepiece observing from a backyard or travel site.
For more light, move up to the MEEZAA 90mm refractor or a reflector with a 114mm or 130mm aperture.
If you want a large aperture with automated pointing, the Celestron NexStar 8SE is the most capable visual telescope in this group.
Visual astronomy means looking through an eyepiece rather than relying on a camera screen. That makes aperture, focus, mount control and the quality of your observing location central to the choice.
A beginner price and a smaller scope often make more sense than a larger instrument that stays indoors. Once you know which targets interest you, stepping up in aperture or automation becomes a clearer decision.
Our picks at a glance
-
1
-
2

-
3
- 4
 Check it
CELTICBIRD Telescope for Adults High Powered
Best for family moon and planet sessions - 5
 Check it
Celestron StarSense Explorer LT 114AZ Newtonian Smartphone
Best for guided deep-sky beginners - 6
 Check it
Celestron AstroMaster 130EQ Telescope for Deep-Sky Beginners
Best for manual deep-sky learning - 7
 Check it
Celestron NexStar 8SE Computerized Telescope
Best for automated visual astronomy - 8
 Check it
CELTICBIRD Telescope for Adults High Powered
Best for long-focus refractor views - 9
 Check it
SVBONY SV503 Telescope for Adults High Powered
Best for advanced refractor optics
Which telescopes are best for visual astronomy?
The best telescopes for visual astronomy balance aperture, manageable setup and a mount that matches your experience. Refractors are simple and low-maintenance, reflectors gather more light for their size, and computerized scopes reduce the work of finding targets.
We compared the stated optical sizes, mounts, controls and included accessories against common home and backyard observing needs.
Our score weighs specs, features and buyer feedback against what you're shopping for.
Aperture decides how much light the telescope can collect, and that shapes what you can see on faint objects. A larger objective or mirror is helpful, but it also brings weight, length and a greater need for a steady tripod.
Mount type decides how you point and follow a target during a session. An altazimuth mount moves up and down and side to side, which feels intuitive at first, while an equatorial mount follows the sky in a different way that takes practice to learn.
Computerized mounts add object databases and tracking, so they suit people who want to spend less time searching and more time looking. The trade off is extra setup steps and more to learn before the first target is centered.
Included accessories matter for daily use because a telescope without a suitable eyepiece, finderscope or stable tripod is harder to enjoy. Start with a lower power eyepiece to find a target, then change power only when the image stays clear.
Your observing place also shapes the right pick. A compact refractor suits a small yard or a trip to a campsite, while a reflector or computerized scope suits a fixed backyard spot where you can leave it set up.
Care is simple for most visual scopes, but it should not be skipped. Keep covers on the optics when stored, let the instrument reach outdoor temperature before use, and handle eyepieces by their barrels rather than the glass.
For readers moving beyond beginner equipment, our guide to professional telescopes for astronomy explains how larger and more specialized setups change the decision.
| Product | Best for | Aperture | Focal length | Mount | Our score |
|---|---|---|---|---|---|
| Gskyer Telescope | portable backyard observing | 70mm | 400mm | Altazimuth | 9.7 |
| MEEZAA Telescope | brighter beginner views | 90mm | 800mm | Altazimuth | 9.6 |
| DWARFLAB Dwarf Mini Smart Telescope | app-guided observing | 9.5 | |||
| CELTICBIRD Telescope for Adults High Powered | family moon and planet sessions | 80mm | 600mm | Altazimuth | 9.5 |
| Celestron StarSense Explorer LT 114AZ Newtonian Smartphone | guided deep-sky beginners | 114mm | 1000mm | 9.5 | |
| Celestron AstroMaster 130EQ Telescope for Deep-Sky Beginners | manual deep-sky learning | 130mm | 650mm | Equatorial | 9.3 |
| Celestron NexStar 8SE Computerized Telescope | automated visual astronomy | 8 in | 2032mm | Computerized altitude-azimuth | 9.3 |
| CELTICBIRD Telescope for Adults High Powered | long-focus refractor views | 80mm | 900mm | Altazimuth | 8.9 |
| SVBONY SV503 Telescope for Adults High Powered | advanced refractor optics | 102mm | 714mm | 8.1 |
The best telescopes for visual astronomy
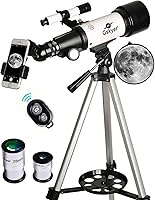
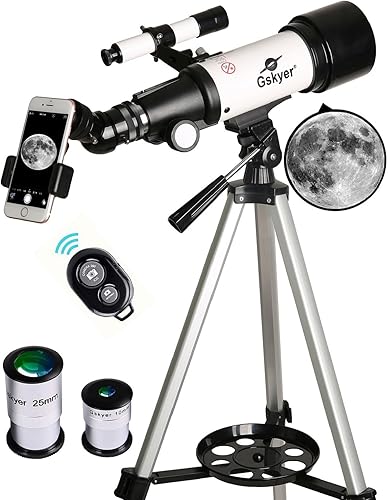
Gskyer Telescope: best for portable backyard observing
Gskyer Telescope: Best for portable backyard observing
- 70mm aperture
- 400mm focal length
- Altazimuth mount
- Two eyepieces and 3x Barlow lens
- Carry bag, phone adapter and wireless remote
The compact 70mm refractor is easy to carry and suited to lunar and planetary viewing. Its phone adapter, wireless remote and included carry bag make casual backyard or travel observing simple.
Pros
- Portable design
- Phone adapter and wireless remote
- Adjustable aluminum tripod
Cons
- Smaller aperture than the larger picks
- Manual focus and pointing
The Gskyer Telescope is the easiest all-around pick for a beginner who wants direct eyepiece views without a large setup. Its 70mm aperture and 400mm focal length suit the Moon, planets and bright daytime targets.
The altazimuth mount keeps pointing simple. Two replaceable eyepieces and a 3x Barlow lens give you several magnification options, but sharp views still depend on steady placement and careful manual focus.
The adjustable aluminum tripod and carry bag make this scope useful when you need to move between a backyard, a campsite and storage. The phone adapter and wireless remote support simple smartphone images, although the scope is primarily a visual refractor.
Never point any telescope at the Sun. Let the instrument reach the outdoor temperature before observing, and protect the front lens from condensation when moving between large temperature changes.
Buy this one if you want a compact first telescope for the Moon and planets.
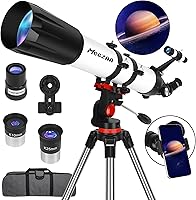
MEEZAA Telescope: best for brighter beginner views
MEEZAA Telescope: Best for brighter beginner views
- 90mm aperture
- 800mm focal length
- Fully multi-coated optics
- 32x to 240x magnification range
- Stainless steel tripod, phone adapter and carry bag
The 90mm refractor gathers more light than the smaller portable scopes here. Its longer focal length and included eyepieces suit lunar and planetary observing from a backyard.
Pros
- Large 90mm aperture
- Fully multi-coated optics
- Adjustable stainless steel tripod
Cons
- Longer optical tube
- Manual pointing and focus
The MEEZAA Telescope gives beginners a larger 90mm aperture and 800mm focal length than the compact Gskyer. That extra objective size can gather more light, while the longer tube favors detailed lunar and planetary viewing.
Its fully multi-coated optical glass, 10mm and 25mm eyepieces, and 3x Barlow lens create a broad magnification range. Use the lower-power eyepiece first to find a target, then increase power when the air is calm and the image remains clear.
The stainless steel tripod adjusts from 28 to 46 inches. The phone adapter, carry bag, accessory tray and manual make it a fuller backyard setup for a beginner who wants more reach than a travel refractor.
Choose this model when brightness and a longer focal length matter more than the smallest packed size. For a wider comparison of experience levels, see best intermediate telescope for adults.
DWARFLAB Dwarf Mini Smart Telescope: best for app-guided observing
DWARFLAB Dwarf Mini Smart Telescope: Best for app-guided observing
- 1.85lb portable design
- App control and built-in sky atlas
- Auto GOTO and 360-degree pivot
- Altazimuth and equatorial modes
- 90-second exposures and built-in filters
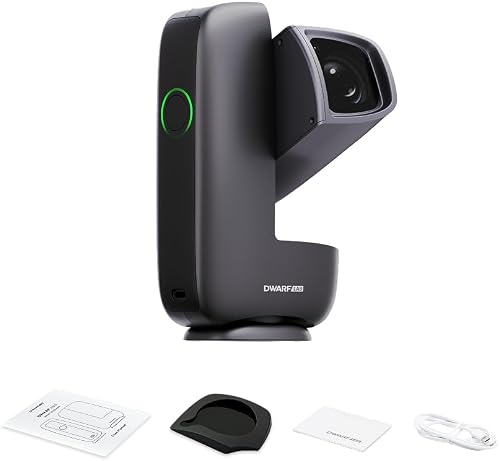
The Dwarf Mini is a digital telescope for people who want app guidance and automated pointing. Its small, battery-powered body is easy to carry to dark-sky locations.
Pros
- Very light and portable
- Auto GOTO
- Built-in processing and filters
Cons
- Digital viewing differs from direct eyepiece observing
- Small 30mm objective lens
The DWARFLAB Dwarf Mini is the unusual pick here because it is a digital telescope rather than a traditional eyepiece-first instrument. Its 1.85lb body, app control, built-in sky atlas and Auto GOTO suit people who want guided exploration with minimal equipment.
The 30mm objective lens and Sony IMX662 sensor support digital views, while the app can use a 360-degree pivot and equatorial mode. The system also supports single-frame exposures up to 90 seconds and includes a filter.
This is a strong travel choice for camping, hiking or dark-sky trips. It is less suitable if your main goal is the classic experience of placing your eye at an eyepiece and manually studying the view.
The box includes the telescope, filter, USB-C to USB-C cable and cleaning cloth. Battery power and app control make the workflow different from the manual refractors and reflectors in this roundup.
CELTICBIRD 80mm Telescope: best for family moon and planet sessions
CELTICBIRD Telescope for Adults High Powered: Best for family moon and planet sessions
- 80mm aperture
- 600mm focal length
- Two eyepieces
- Moon filter and 5x24 finderscope
- Backpack and phone adapter
This portable 80mm refractor gives beginners a straightforward path to viewing the Moon, Saturn and Jupiter. The adjustable tripod and backpack support shared family use.
Pros
- Moon filter included
- Portable backpack design
- No-tools setup
Cons
- Manual pointing
- Less light gathering than the 114mm and 130mm reflectors
The CELTICBIRD Telescope for Adults High Powered uses an 80mm aperture and 600mm focal length in a portable refractor. It fits families who want a simple scope for the Moon, Saturn and Jupiter without starting with an equatorial mount.
The 20mm and 9mm eyepieces provide 30x and 66x magnification. A moon filter transmits 13 percent of incoming light, and the 5x24 finderscope helps you locate bright targets before looking through the main eyepiece.
Its aluminum tripod adjusts from 17.7 to 52 inches, which gives adults and children more flexibility during a shared observing session. The backpack and phone adapter also support travel and basic phone images.
This is a good middle ground between the smaller Gskyer and the larger reflectors. Pick it when portability and family use matter more than maximum deep-sky light.
Celestron StarSense Explorer LT 114AZ: best for guided deep-sky beginners
Celestron StarSense Explorer LT 114AZ Newtonian Smartphone: Best for guided deep-sky beginners
- 114mm Newtonian reflector
- StarSense smartphone sky guidance
- 1000mm focal length
- Manual altazimuth mount
- 25mm and 10mm eyepieces with 2x Barlow lens
The 114mm reflector combines more light gathering with smartphone-guided object finding. It suits beginners who want direct eyepiece views but need help locating planets, nebulae and galaxies.
Pros
- Large reflector aperture
- Smartphone sky recognition
- Manual slow-motion adjustment
Cons
- Heavier than compact refractors
- Requires a compatible smartphone
The Celestron StarSense Explorer LT 114AZ is the best beginner reflector here for readers who want help finding deep-sky targets. Its 114mm Newtonian mirror and 1000mm focal length gather more light than the small refractors.
The StarSense app uses smartphone sky recognition and on-screen arrows to guide you toward stars, planets, nebulae and galaxies. The manual altazimuth mount includes altitude slow-motion adjustment, so you still control the telescope directly after the app helps locate the target.
The 25mm and 10mm eyepieces, 2x Barlow lens, StarPointer finderscope and tripod create a complete visual setup. Keep your phone aligned with the telescope and use the lower-power eyepiece when starting on a new object.
This model suits a beginner who wants direct eyepiece observing with digital help. It is a better deep-sky starting point than a small refractor, but it takes more room and weighs 10.4lb.
Celestron AstroMaster 130EQ: best for manual deep-sky learning
Celestron AstroMaster 130EQ Telescope for Deep-Sky Beginners: Best for manual deep-sky learning
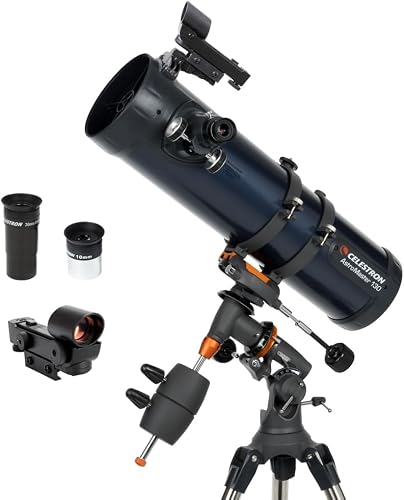
- 130mm Newtonian reflector
- 650mm focal length
- German equatorial mount
- Right ascension and declination controls
- 20mm and 10mm eyepieces
The 130mm reflector gathers substantial light for a beginner telescope. Its equatorial mount and slow-motion controls reward readers who want to learn manual tracking.
Pros
- Largest aperture among the beginner manual picks
- Equatorial slow-motion controls
- Adjustable full-height tripod
Cons
- Heavier 17lb setup
- Equatorial mount has a steeper learning curve
The Celestron AstroMaster 130EQ brings the largest aperture among the beginner manual setups here. Its 130mm Newtonian reflector collects more light for lunar, planetary and deep-sky observing, while the German equatorial mount teaches a more deliberate way to track objects.
Two slow-motion control knobs adjust right ascension and declination. That control style is useful when you want to follow an object manually, but an equatorial mount has more setup steps than a simple altazimuth mount.
The 20mm eyepiece with built-in erect image corrector, 10mm eyepiece and StarPointer red dot finderscope cover the basic visual workflow. The full-height tripod can be adjusted for standing or seated observing.
At 17lb fully assembled, this scope is less convenient to move than the compact refractors. Choose it when aperture and learning manual tracking matter more than quick travel setup.
Celestron NexStar 8SE: best for automated visual astronomy
Celestron NexStar 8SE Computerized Telescope: Best for automated visual astronomy
- 8-inch Schmidt-Cassegrain optics
- Fully computerized GoTo mount
- 40,000-plus object database
- SkyAlign technology
- 25mm eyepiece
The NexStar 8SE is the strongest visual option here for buyers who want a large aperture and automated object finding. Its 8-inch optics are suited to detailed lunar, planetary and deep-sky views.
Pros
- Largest aperture in this roundup
- Automated GoTo tracking
- SkyAlign setup
Cons
- More complex than manual scopes
- Less compact than the travel picks
The Celestron NexStar 8SE is the strongest visual telescope here for buyers who want 8-inch Schmidt-Cassegrain optics and computerized GoTo tracking. Its aperture gives it a clear advantage for fine lunar details, planetary features and many deep-sky targets.
SkyAlign helps set up the mount by using 3 bright stars or planets. After alignment, the NexStar+ hand control can select from a database of more than 40,000 objects, then slew to and track the chosen target.
The included 25mm eyepiece, StarPointer finderscope, star diagonal, single fork arm mount and tripod form a complete computerized package. Its 2032mm focal length favors detailed views, while the automated mount reduces manual searching.
This is a major step up from the beginner refractors. Read best telescope for advanced astronomers if you are comparing this kind of system with more specialized equipment, and see best telescope for professionals for higher-end observing goals.
CELTICBIRD 80mm 900mm Telescope: best for long-focus refractor views
CELTICBIRD Telescope for Adults High Powered: Best for long-focus refractor views
- 80mm aperture
- 900mm focal length
- Wide-angle eyepieces
- 5x24 finderscope
- Carry case, adjustable tripod and phone mount
The 900mm refractor favors a longer focal length in a portable beginner setup. It is a sensible fit for readers focused on the Moon and planets rather than maximum deep-sky light.
Pros
- Long 900mm focal length
- Wide-angle eyepieces
- Carry case included
Cons
- Longer tube than the 600mm refractor
- Smaller aperture than the reflector picks
This CELTICBIRD refractor uses an 80mm aperture and 900mm focal length, giving it a longer optical tube than the brand's 600mm model. That makes it a better fit for buyers who want a simple refractor focused on lunar and planetary viewing.
The 20mm and 10mm wide-angle eyepieces support different viewing powers, while the 5x24 finderscope helps locate bright objects. The phone mount allows basic smartphone capture through the telescope.
An adjustable aluminum tripod changes from 20 to 45 inches, and the carry case helps with storage. The longer tube may need more room in transport than a short 70mm or 600mm refractor.
Choose this pick for a long-focus beginner refractor with a case. Choose the 80mm 600mm model instead when a shorter tube and wider family-friendly height range matter more.
SVBONY SV503: best for advanced refractor optics
SVBONY SV503 Telescope for Adults High Powered: Best for advanced refractor optics
- 102mm aperture
- 714mm focal length
- S-FPL51 ED glass
- Dual-speed focuser
- 360-degree field rotator and retractable hood
The SV503 is an optical tube for experienced observers who value ED glass, precise focusing and a field rotator. It needs a separate observing setup because no finderscope is included.
Pros
- S-FPL51 ED glass
- Dual-speed focuser
- 360-degree field rotator
Cons
- No finderscope
- Tripod mount rather than a complete visual setup
The SVBONY SV503 is an optical tube for experienced observers who want 102mm aperture, S-FPL51 ED glass and precise focusing. Its 714mm focal length supports both visual observation and camera-oriented setups.
The dual-speed focuser gives finer manual adjustment, while the 360-degree field rotator helps align a camera or eyepiece without rotating the tube. The 133mm retractable hood blocks stray light and helps protect the objective from dew.
This model does not include a finderscope, so it is not as ready for a first observing night as the complete kits above. Its tube rings, dovetail plate, adapter and dust cover make more sense for someone building a setup around existing observing gear.
Choose it when optical control matters more than an all-in-one beginner package. For a narrower comparison of refractor designs, read best refractor telescope for visual astronomy.
What aperture do you need for backyard astronomy?
For backyard astronomy, 70mm to 90mm is enough for simple lunar and planetary observing, while 114mm to 130mm gives you more light for deep-sky targets. An 8-inch telescope shows the most detail in this roundup, but it also demands more setup planning.
Aperture is the diameter of the telescope's objective lens or primary mirror. Larger apertures can collect more light, but they do not remove the effects of clouds, wind, poor focus or city light pollution.
A small refractor can be the better choice if you need to carry the telescope outside quickly. A larger reflector makes more sense when you have a stable observing area and want to spend longer sessions on faint objects.
How should you choose a telescope mount?
Choose an altazimuth mount for the simplest manual setup, an equatorial mount if you want to learn slow-motion tracking, and a computerized mount if automated pointing matters most. The mount affects how quickly you can begin and how easily you can keep an object centered.
The Gskyer, MEEZAA and CELTICBIRD refractors use altazimuth mounts. The AstroMaster 130EQ uses an equatorial mount, while the NexStar 8SE uses a computerized altitude-azimuth mount.
An altazimuth mount is the easiest first choice because its movements match how people expect a telescope to move. You turn left or right and tilt up or down, and the target stays roughly where you left it.
That simplicity has a limit during long looks at a moving object. As the sky turns, the target drifts from the center, so you need to nudge the telescope from time to time to keep it in view.
An equatorial mount is designed around that movement, so it can follow an object more smoothly once it is set up correctly. Its right ascension and declination controls let you make small, steady corrections instead of pushing the tube by hand.
Learning an equatorial mount takes more care at the start of the night. You need to understand how the mount is oriented, how the slow motion knobs work, and how to reset the view after a change of target.
A computerized mount removes much of that manual work by finding and tracking a target from a database. It suits people who want longer sessions on many objects without spending the night learning star patterns.
The trade off is complexity, power needs and a higher cost for the mount itself. Alignment still matters, so give the system time to settle before you judge the view.
Tripod choice matters with any mount because vibration makes focus and high magnification harder. A sturdy tripod on firm ground keeps the image steadier than a light one on soft soil or a deck.
Set the tripod height for comfort before you attach the telescope and check that all locks are tight. A height that lets you sit or stand without leaning reduces fatigue and helps you keep the target centered.
Start each session with the lowest power eyepiece you have and find the target first. Higher magnification narrows the view, so it is easier to use after the object is already centered and focused.
Keep the eyepiece and finderscope clean and covered when not in use, and avoid touching the optics unless you need to clean them. Pick the mount you will actually set up on a clear night, as a simple mount that gets used often can beat a complex one that stays in the box.
Can you see galaxies with a home telescope?
Yes, you can see galaxies with a home telescope, but most galaxies appear as faint, soft shapes through a backyard instrument. Dark skies, clear air and careful dark adaptation can matter as much as the telescope itself.
The 114mm StarSense Explorer and 130mm AstroMaster are strong beginner choices for deep-sky learning. The 8-inch NexStar 8SE gathers the most light here, while the smaller refractors are better suited to bright targets.
Avoid judging a visual telescope by colorful long-exposure images. Direct eyepiece views are usually subtler, and the experience depends on your eyes, the sky and your ability to find and focus on the target.
How do you set up a telescope for visual observing?
Set up on firm, level ground, allow the telescope to reach the outdoor temperature, and begin with a low-power eyepiece. Focus slowly, center a bright target, and only then try more magnification.
Check the tripod and mount before each session. Keep lens covers on when the telescope is stored, use the supplied dust protection where applicable, and avoid touching optical glass unless cleaning is needed.
Never aim any telescope at the Sun without a purpose-built solar filter mounted correctly over the front aperture. A regular moon filter, eyepiece filter or phone setup is not a substitute for safe solar equipment.
Choose your site before you carry the telescope outside, and pick a spot with a clear view of the part of the sky you want to watch. A firm surface helps the tripod stay steady, while nearby lights can make faint targets harder to see.
Unpack the telescope in a clear area so small parts stay together and nothing rolls away. Lay out the eyepieces and finderscope where you can reach them without turning your back on the setup.
Assemble the tripod first and set its legs on ground that does not sink or shift. Tighten each lock, then attach the mount and telescope in the order given in the manual.
Level the mount as well as you can and snug down the controls so the tube does not drift on its own. You should still be able to move it smoothly when you want to change targets.
Let the telescope sit outside for a while before you expect a sharp view. A change in temperature can make the image waver, so patience at the start often saves frustration later.
Use the finderscope or the lowest power eyepiece to locate a bright target first. The Moon or a bright planet is a good place to practice focus because it gives you a clear edge to work with.
Turn the focus wheel slowly and stop as soon as the edge looks crisp rather than guessing past the best point. If the image is larger but softer, you have gone too far and should back off gently.
Center the target in the view before you change eyepieces, since a higher power makes the field smaller. Keep your head steady and avoid touching the telescope while you look, as small movements can shake the image.
Try higher magnification only when the air is calm and the target stays clear. Wind, heat rising from a roof, and poor seeing can make extra power look worse rather than better.
End the session by capping the front aperture and eyepiece, then loosening the mount in the reverse order of setup. Store the telescope dry and covered so dust and moisture do not settle on the optics, and keep a short routine for every night so setup becomes familiar and faster.
Best telescope for visual astronomy: the final choice
The Gskyer Telescope is the best telescope for visual astronomy for most beginners because it combines a portable 70mm refractor with a simple mount and useful travel accessories. Pick the MEEZAA for a brighter 90mm refractor, the StarSense Explorer for guided deep-sky finding, or the AstroMaster 130EQ for manual tracking practice.
Choose the NexStar 8SE if your priority is a large 8-inch aperture and automated GoTo observing. Choose the SVBONY SV503 if you already have supporting gear and want a more advanced refractor tube with ED glass and precise focusing.
Think first about where you will observe and how often you will carry the telescope outside. A compact refractor suits a small yard, a balcony with a clear patch of sky, or trips to a darker site.
A larger reflector suits a fixed backyard spot where you can set up, observe for a long stretch, and store the instrument safely. Weight and tube length matter as much as aperture once the night is underway.
Match the mount to your patience for learning. A simple altazimuth mount gets you looking fastest, an equatorial mount teaches manual tracking, and a computerized mount points for you.
Use the included eyepieces to learn what each magnification does to the view. Start low to find a target, then move up only when the image stays clear and steady.
Dark skies and calm air can change what any of these telescopes shows, so choose a site with less light when you can. Let your eyes adapt for a while before you judge faint objects.
Care for the optics between sessions by keeping covers on and avoiding needless handling of the glass. A clean, covered telescope is ready when the sky clears.
If you want the easiest first step, start with the Gskyer and learn the basics of focus and pointing. You can later add aperture, guidance, or automation without changing how you enjoy looking through the eyepiece.
Our top 3 picks at a glance
-
1
-
2
-
3
Frequently asked questions
What is the best telescope for visual astronomy?
The best telescope for visual astronomy depends on your observing style. The Gskyer is the easiest portable choice for lunar and planetary viewing, while the Celestron AstroMaster 130EQ adds aperture for deep-sky observing.
Choose the NexStar 8SE if automated pointing and a large 8-inch aperture matter most.
What telescope is best for backyard astronomy?
The best telescope for backyard astronomy is usually one with enough aperture for your targets and a mount you can set up comfortably. A 70mm or 80mm refractor is simple for the Moon and planets, while a 114mm, 130mm or 8-inch scope shows more deep-sky detail.
Can you see galaxies with a home telescope?
Yes, you can see galaxies with a home telescope, but most appear as faint gray shapes rather than colorful photographs. A larger aperture helps gather more light, and darker skies often matter as much as the telescope.
The 114mm, 130mm and 8-inch models here are the strongest choices.
What matters most for direct eyepiece observing?
Aperture, mount stability, optical design and observing conditions matter most for direct eyepiece observing. Larger aperture gathers more light, while a steady mount keeps the view easier to follow.
Start with a low-power eyepiece, focus carefully and increase magnification only when the image stays sharp.