6 Best High Powered Telescopes (November 2026)
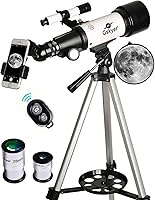
The best high powered telescopes include the MEEZAA Telescope for most beginners, the CELTICBIRD Telescope for Adults High Powered for portable family observing, and the HUGERSTAR Telescope for lunar viewing with extras.
On this page (6 sections)
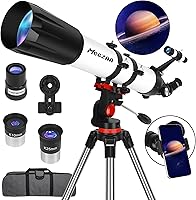
The best high powered telescope for most beginners is the MEEZAA Telescope, with a 90mm aperture, 800mm focal length and 32X–240X magnification range. Choose the Dianfan for the largest aperture, the Hawkko for a longer focal length, or the SVBONY for camera-focused observing.
High power is not just the biggest number printed on a box. You also need enough aperture to gather light, a focal length that suits your targets, and a mount that stays steady while you focus.
For a wider overview of professional telescopes for astronomy, compare the equipment level and mount type before choosing a model. We also explain how these picks fit different experience levels in our guides to the best telescope for advanced astronomers and the best telescope for professionals.
Our score weighs aperture, optics, useful magnification, mount design, included accessories and buyer feedback against the needs of a high powered telescope shopper.
Our picks at a glance
-
1

-
2
 Best for portable family observing
CELTICBIRD Telescope for Adults High Powered
9.5/10 our score
See it on Amazon -
3

- 4
 Check it
Hawkko 90mm Aperture 900mm Telescope for Adults
Best for longer focal length - 5
 Check it
Dianfan 150EQ Professional Astronomy Telescope for Adults
Best for maximum aperture - 6
 Check it
SVBONY SV503 Telescope for Adults High Powered
Best for camera-ready upgrades
The best high powered telescope picks
The MEEZAA is the strongest all-around starting point, while the other telescopes serve distinct needs such as portability, longer focal length, maximum aperture or camera work.
MEEZAA Telescope: Best for most beginners
- 90mm aperture
- 800mm focal length
- 32X–240X magnification
- Tripod, phone adapter and carry bag
The MEEZAA combines a 90mm aperture with an 800mm focal length and a broad 32X–240X range. Its tripod, phone adapter and carry bag make it a practical starting point for backyard observing.
Pros
- 90mm aperture
- 3X Barlow lens
- Phone adapter and carry bag
Cons
- Manual focus
- Altazimuth mount is not an equatorial mount
The MEEZAA is the best match for a beginner who wants a complete refractor kit with a useful aperture. Its 90mm aperture and 800mm focal length give you a stronger starting point than a smaller beginner scope, while the fully multi-coated optical glass is designed to improve brightness and clarity.
The included 10mm and 25mm eyepieces produce different viewing levels, and the 3X Barlow lens triples the magnification of each eyepiece. The stated range is 32X–240X, but sharp high-power views still depend on calm air, accurate focus and a steady tripod.
Its stainless steel tripod adjusts from 28 to 46 inches. A phone adapter and carry bag make it easier to share lunar views or move the telescope between a backyard and an observing site.
Choose this model when you want a high powered telescope with a broad accessory kit. Its altazimuth mount is simple to point by hand, but it does not provide the slow-motion tracking controls of the Dianfan's equatorial mount.
CELTICBIRD Telescope for Adults High Powered: Best for portable family observing
- 80mm aperture
- 600mm focal length
- 30X and 66X eyepieces
- Backpack, phone adapter and moon filter
The CELTICBIRD is easier to carry than the longer-tube choices because its accessories fit in a backpack. Its 30X and 66X options suit beginners learning to find the Moon and bright planets.
Pros
- Portable backpack
- Adjustable 17.7–52 in tripod
- Moon filter included
Cons
- Smaller aperture than the 90mm models
- Only two stated magnification levels
The CELTICBIRD is the most portable family-friendly pick in this group. Its 80mm aperture and 600mm focal length keep the optical tube shorter than the 90mm and 900mm models, while the backpack holds the telescope accessories for travel.
The two eyepieces produce 30X and 66X magnification. That narrower range is easier for a new observer to understand, and the 5x24 finderscope helps you locate the Moon and bright planets before switching to the main view.
The adjustable aluminum tripod reaches from 17.7 to 52 inches, so adults and children can use it at different heights. A phone adapter supports basic phone photography, while the moon filter is intended to reduce glare during lunar viewing.
Packing everything into the backpack suits camping trips, car journeys and family evenings in a garden. Storage is simpler too, since eyepieces and small parts can stay together instead of scattered in separate boxes.
Set the tripod on firm ground and check each leg before you start. Let the telescope settle for a few minutes so small vibrations fade.
Pick it when portability and simple family observing matter more than the largest aperture. The smaller 80mm aperture gathers less light than the 90mm, 102mm and 150mm options here.
HUGERSTAR Telescope: Best for lunar viewing with extras
- 90mm aperture
- 800mm focal length
- 32X–240X magnification
- Moon filter, phone adapter and carrying bag
The HUGERSTAR matches the MEEZAA on aperture, focal length and stated range while adding a moon filter. Its adjustable stainless steel tripod supports backyard or travel use.
Pros
- 90mm aperture
- 3X Barlow lens
- Moon filter included
Cons
- Manual focus
- Straight-through finder scope
The HUGERSTAR is a strong choice for buyers who want a 90mm refractor with a moon filter included. Its 90mm aperture, 800mm focal length and 32X–240X range give it the same core size and stated power range as the MEEZAA.
The 10mm and 25mm eyepieces work with the 3X Barlow lens to create the stated range. Start with the lower magnification to locate a target, then increase power gradually as focus and air conditions allow.
Its stainless steel tripod adjusts from 28.7 to 46.4 inches and includes an accessory tray. The phone adapter works with a smartphone, while the carrying bag helps with storage and transport.
The moon filter makes this the better fit between the two 90mm, 800mm choices when lunar observing is your main goal. It cuts glare so bright lunar views can feel more comfortable for longer sessions.
Keep the accessory tray close so eyepieces stay clean and easy to swap. Wipe lenses gently and return caps after each session to protect the coatings.
Choose the MEEZAA instead if its included accessory layout or slightly shorter stated tripod range fits your setup better. Both choices suit backyard beginners who want a complete kit.
Hawkko 90mm Aperture 900mm Telescope for Adults: Best for longer focal length
- 90mm aperture
- 900mm focal length
- 36X–270X magnification
- AZ mount, phone adapter and carry bag
The Hawkko uses the same 90mm aperture as several picks but extends the focal length to 900mm. Its 36X–270X range and included 3X Barlow lens suit buyers focused on lunar and distant views.
Pros
- Longest focal length among the 90mm refractors
- 36X–270X range
- Stainless steel tripod
Cons
- Heavier at 5 kg
- Long 90cm optical tube
The Hawkko is the best high powered telescope here for buyers who want a 900mm focal length in a 90mm refractor. Its 36X–270X range is higher than the stated ranges of the MEEZAA and HUGERSTAR, with a 3X Barlow lens included.
The longer focal length can suit observers who want a narrower, more focused viewing approach for the Moon and distant targets. High magnification still requires careful manual focusing and a stable surface.
Its stainless steel altazimuth tripod adjusts from 28 to 46 inches and supports 360-degree rotation. The package includes a finder scope, zenith mirror, two eyepieces, a Barlow lens, phone adapter, accessory tray and carry bag.
The zenith mirror helps with comfortable viewing angles when the target sits high. That matters more on long lunar sessions than on brief checks of a bright planet.
Use the lower eyepiece first to centre a target, then step up power slowly. Pause at each step to refocus, because small focus errors show quickly at high power.
At 5 kg with a 90cm optical tube, it is less convenient to move than the shorter CELTICBIRD. Choose it when the longer tube and higher stated range matter more than low carrying weight.
Dianfan 150EQ Professional Astronomy Telescope for Adults: Best for maximum aperture
- 150mm aperture
- 650mm focal length
- 26X–130X magnification
- Equatorial mount and stainless steel tripod
The Dianfan has the largest aperture here, giving it the strongest light-gathering specification in this group. Its equatorial mount adds tracking controls, but the complete setup weighs 14 kg.
Pros
- Largest 150mm aperture
- Equatorial mount
- Slow-motion control cables
Cons
- Heaviest option
- About 20 minutes to assemble
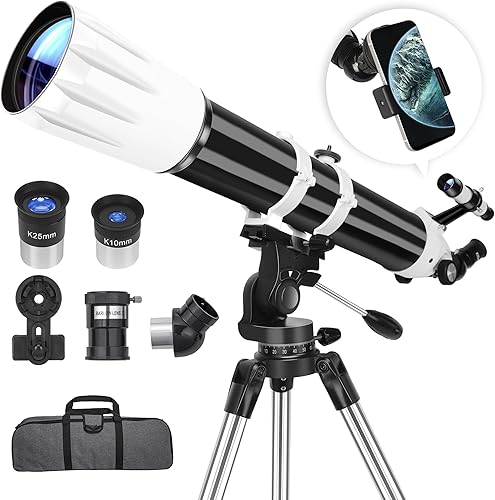
The Dianfan is the aperture leader, with a 150mm reflector and 650mm focal length. That larger aperture gives it the strongest light-gathering specification in this roundup, while the 26X–130X range keeps the stated magnification below the highest figures on the refractors.
Its German-style equatorial mount includes intuitive dials and slow-motion control cables. That design can help you keep an object centered as the sky appears to move, but it takes more setup practice than an altazimuth mount.
The tripod adjusts from 48.4 to 66.2 inches. A red dot finderscope, phone adapter and carrying bag are included, and the bag measures 35.4 by 13.9 by 9.4 inches and weighs 14 kg with the telescope setup described.
The taller tripod range suits standing observing without bending over. It also means you need clear floor space around the setup while you work.
Allow extra time for assembly and levelling before your first session. Practice the slow-motion cables in daylight so the controls feel familiar at night.
Pick it if maximum aperture is your main goal and you have room for a heavier setup. It is not the easiest choice for quick travel or a small storage area.
SVBONY SV503 Telescope for Adults High Powered: Best for camera-ready upgrades
- 102mm aperture
- 714mm focal length
- S-FPL51 ED glass
- Dual-speed focuser and 360° field rotator
The SVBONY is an optical tube assembly for buyers who already have compatible observing or camera equipment. Its ED glass, dual-speed focuser and 360° field rotator are aimed at precise visual and astrophotography work.
Pros
- 102mm aperture
- S-FPL51 ED glass
- 90mm focus travel
Cons
- No finderscope
- Mount and core accessories are not a complete beginner kit
The SVBONY is the specialist choice for buyers who want an optical tube for visual observing and astrophotography equipment. Its 102mm aperture, 714mm focal length and S-FPL51 ED glass are aimed at brighter, higher-contrast views with less color fringing.
A dual-speed focuser provides finer focus adjustment than a single-speed design. The 360-degree field rotator helps align a camera without rotating the whole tube, and the 90mm focus travel leaves room for accessories such as filter wheels and field flatteners.
This is not the most complete beginner package in the group. It has no finderscope, and its listed compatible equipment includes cameras, finder scopes, mirror diagonals, telescope eyepieces and telescope filters.
Choose it when you already understand telescope accessories or plan to build a camera-ready setup. For a first telescope with a tripod, eyepieces and phone adapter, one of the complete kits above is easier to match.
How much aperture do you need for a high powered telescope?
A 90mm aperture is a practical middle ground for beginners who want more light than a small starter scope without moving to the 14 kg Dianfan setup. The 102mm SVBONY adds aperture while serving a more advanced equipment path.
Aperture affects light gathering and the amount of detail an optical system can show. It does not guarantee a sharp view at the highest advertised magnification because air movement, focus and mount stability also affect what you see.
Think about where you will observe most often first. A backyard telescope needs to fit on a patio, pass through a door and store in a cupboard without a struggle.
A 90mm refractor balances light gathering with a tube that many households can carry. That balance helps beginners observe more often, which matters more than a larger lens used rarely.
The 80mm CELTICBIRD shows how a smaller aperture can still work well for the Moon. Its shorter tube and backpack make regular use easier for families.
Moving to 102mm or 150mm brings more light but also more size and weight. The SVBONY and Dianfan both ask for more commitment in storage and setup.
Brightness also depends on the sky above you. Light pollution can wash out faint detail even through a large aperture.
Calm air helps too, because steady air keeps planet images from shimmering. A smaller scope on a calm night can look pleasingly sharp.
Consider focal length alongside aperture when you compare models. A longer tube narrows the view and can make aiming harder for a new user.
Accessories shape daily use as well. Eyepieces, a finder scope and a stable tripod decide how quickly you find targets.
Manual focus rewards patience on every model in this group. Spend time on focus before you blame the aperture for a soft image.
The 150mm Dianfan has the largest aperture here. It can suit buyers who want the strongest light-gathering specification and are willing to manage a larger reflector, equatorial mount and heavier carrying bag.
Choose 90mm if you want a flexible first step into serious backyard observing. Choose larger only when your space, time and carrying plans support it.
Is more magnification always better?
More magnification is not always better because increasing power also makes movement, vibration and poor air conditions easier to see. A 240X or 270X setting is useful only when the image remains focused and steady.
Start with the lowest useful eyepiece power. Center the Moon or planet, focus carefully, and then move to a higher-power eyepiece or Barlow lens if the image still shows clear detail.
Magnification spreads the same light over a larger view. That means the image can look dimmer and less detailed as power climbs.
A Barlow lens triples the power of the eyepiece in front of it. It is a handy way to reach high power without owning many eyepieces.
Small movements grow at high power too. Wind, an unsteady tripod or a touch on the tube can blur the view for a moment.
Give the telescope time to settle after each adjustment. Wait a few seconds before you judge the sharpness of the image.
Planets are small targets, so they invite high power. Yet a steady lower-power view often shows bands and moons more clearly.
The Moon tolerates higher power better for many beginners. Its bright surface still gives plenty of contrast when craters come into focus.
Learn to focus slowly and in small steps. Overshooting focus is common, and it can make a good view look poor.
Change eyepieces gently and keep the tube pointing at the target. Swapping parts can shift the view, so recentre before you focus again.
Weather sets the real ceiling on useful power. Turbulence near the ground can shimmer even on a clear night.
Watch the image for a minute before you step up. If edges wobble, stay at the lower power and enjoy the steadier picture.
For a gradual step up from beginner equipment, our guide to the best intermediate telescope for adults explains how aperture, mount controls and accessory needs change as your observing goals grow.
Which mount is best for high powered viewing?
An altazimuth mount is simpler for hand-guided viewing, while an equatorial mount offers controls designed for tracking the sky. The right choice depends on whether you value quick setup or more controlled tracking.
The MEEZAA, CELTICBIRD, HUGERSTAR and Hawkko use altazimuth mounts. They are suited to direct pointing and general backyard use, but you must adjust the telescope by hand as an object moves.
Altazimuth movement feels natural at first. You move up and down, then left and right, much like pointing a camera.
That simplicity suits short sessions and bright targets. The Moon and planets stay in view long enough for relaxed manual adjustments.
Over longer sessions, you will nudge the telescope again and again. Each nudge can disturb focus or framing, especially at higher power.
The Dianfan uses an equatorial mount with slow-motion control cables. That adds a learning step and more setup weight, yet it can be useful when you want to keep an object centered for longer.
Equatorial alignment asks you to point the mount toward the celestial pole. The included instructions help, but practice makes the routine smoother.
Slow-motion cables let you make tiny movements without grabbing the tube. That control helps during extended views of planets.
Weight is the trade-off across the whole setup. The Dianfan package is heavier, so carrying and storage need more thought.
Tripod height matters on both mount types. A stable height lets you observe standing or seated without strain.
Check the mount locks before you observe. A loose lock can let the tube drift and ruin a careful focus.
Altazimuth suits beginners who want to start quickly. Equatorial suits observers who plan longer, steadier sessions.
Choose the mount that matches your patience for setup. The best mount is the one you will use often and without frustration.
Keep the controls clean and free of grit. A small brush and a dry cloth are enough for routine care.
How should you set up a high powered telescope?
Set the tripod on a flat surface, tighten the adjustment points, and keep the telescope away from avoidable vibration. Begin observing with the lowest magnification, then focus before changing eyepieces.
Choose a clear night with calm air and low humidity when possible. Light pollution can make faint objects harder to see, while atmospheric turbulence can make a high-power image shimmer.
Start setup before dark if you can. Daylight makes small parts, screws and eyepieces easier to handle.
Lay out the parts on a clean tray or table. That habit keeps small accessories from rolling onto grass or gravel.
Assemble the tripod first and spread the legs evenly. Check that each leg locks firmly before you attach the mount head.
Attach the tube and add the finder scope next. Align the finder scope in daylight using a distant landmark.
Add the lowest-power eyepiece and point the telescope at a far object. Focus slowly until the view looks sharp.
Move the tripod to your observing spot and level it again. Tighten the locks, then wait a moment for vibrations to settle.
Let your eyes adapt to the dark for a while. Bright phone screens make faint stars harder to spot.
Use a dim red light if you need to read instructions. That helps preserve your night vision.
Find the Moon first on most nights. It is bright, easy to locate and forgiving of small focus errors.
Centre the target in the finder scope before you look through the main eyepiece. That step saves time at higher power.
Focus with small turns of the focuser knob. Pause between turns and let the image settle.
Swap to a higher-power eyepiece only when the view stays sharp. Refocus after every swap and recentre the target.
Store eyepieces in the accessory tray or case when not in use. Keep caps on lenses to block dust.
Never judge a telescope only by its maximum number. Match the aperture, focal length, mount, carrying weight and included accessories to the way you will actually observe.
For first-time setup and aiming steps, use our guide to How to Use a Telescope for Beginners: A Beginner’s Guide.
Which high powered telescope should you choose?
The MEEZAA Telescope is the best general pick for most beginners because it combines a 90mm aperture, 800mm focal length, broad stated magnification range and complete starter accessories. Choose the CELTICBIRD if you need a more portable family setup.
Pick the HUGERSTAR for a similar 90mm, 800mm design with a moon filter. Choose the Hawkko if you prefer a 900mm focal length and 36X–270X range.
The Dianfan is the right direction for maximum aperture and equatorial tracking. Choose the SVBONY when your priority is precise focusing and camera-ready telescope equipment rather than a complete beginner kit.
Match your choice to how you will carry and store the telescope. A scope that fits your space will get far more use.
The best high powered telescope is the one whose aperture, mount and setup demands match your observing plan. A stable, well-focused view at a useful power is more valuable than an unused maximum magnification number.
Our top 3 picks at a glance
-
1
-
2
Best for portable family observing
CELTICBIRD Telescope for Adults High Powered
9.5/10 our score
See it on Amazon -
3
Frequently asked questions
What makes a telescope high powered?
A high powered telescope needs more than a large magnification number. Aperture controls how much light enters, focal length affects the magnification produced by an eyepiece, and a steady mount helps keep the view usable.
A 3X Barlow can increase eyepiece magnification, but atmospheric conditions and optical limits still matter.
Is a 150mm telescope better than a 90mm telescope?
A 150mm telescope has a larger aperture than a 90mm model, so it has greater light-gathering potential. That does not make it better for every buyer.
The Dianfan 150EQ is also heavier at 14 kg, while the 90mm refractors are easier to carry and set up.
Choose by aperture goals, storage and transport.
What magnification is useful for planets?
Useful planetary magnification depends on aperture, air stability, focus and mount steadiness. The products here range from 26X–130X on the Dianfan to 36X–270X on the Hawkko.
Start with a lower-power eyepiece to find the target, then increase power only when the image remains sharp and steady.
Are high powered telescopes good for beginners?
Some high powered telescopes are suitable for beginners when they include clear setup instructions, an easy mount and useful starter eyepieces. The MEEZAA, CELTICBIRD and HUGERSTAR are designed around beginner use.
A larger or more advanced setup may show more, but it can require more space, weight handling or practice.