How to Make a Telescope for Kids
To make a simple telescope for kids, slide a small convex lens and a larger convex lens into a long paper tube, then adjust the distance until a faraway object looks larger. An adult should handle sharp tools and explain that the telescope must never point at the Sun.
On this page (8 sections)
- What do you need to make a telescope for kids?
- How do you assemble the telescope?
- What can kids observe with a homemade telescope?
- How can you keep the activity safe?
- When is a telescope kit a better choice?
- Can a digital tool help kids explore in other ways?
- What should you use for real astronomy?
- How do you choose between building and buying?
To make a simple telescope for kids, fit a small convex lens and a larger convex lens into a sliding paper tube, then move the tubes until a distant object looks bigger and clear. An adult should supervise the build, and the telescope must never point at the Sun.
This is a simple learning activity, not a replacement for a well-aligned astronomy telescope. The finished tube may show an upside-down, dim, or blurry image, which gives kids a chance to learn how lenses bend light.
What do you need to make a telescope for kids?
You need 2 convex lenses with different focal lengths, 2 cardboard tubes that slide together, tape, and scissors. An adult should cut the tube openings and help secure the lenses.
A magnifying glass can serve as the larger objective lens at the front. A small convex lens works as the eyepiece at the viewing end.
Pick lenses that fit across the tube opening without a gap around the edges.
Use one long cardboard tube and a second tube with a slightly wider opening, or wrap paper around one tube to make a snug sliding fit. The tubes should move without wobbling too much.
The main parts have different jobs. The objective gathers light from a distant object, and the eyepiece magnifies the image for your eye.
How do you assemble the telescope?
Mount the larger lens at the front and the smaller lens at the viewing end, keeping both centered and facing straight down the tube. Secure the lenses with tape or cardboard rings so they cannot fall out.
- Measure the lenses and cut openings in the tube ends that are just smaller than their rims.
- Place the larger lens at the front, with its curved side facing outward if the lens has one.
- Fit the smaller lens at the other end.
- Slide the tubes together so one can move in and out.
- Point the tube at a distant object, away from the Sun, and adjust its length until the view looks sharp.
The ideal spacing depends on the lenses. Keep moving the tubes slowly and avoid pressing the eyepiece against the eye.
Why use 2 sliding tubes?
Sliding tubes let you adjust focus without changing the lenses. Moving them closer or farther apart changes how the light from the objective reaches the eyepiece.
If the tubes are loose, add a thin paper wrap around the narrower section. If they stick, remove a layer and try again.
A child can decorate the outside once the lenses are secure.
What can kids observe with a homemade telescope?
A homemade telescope is best for large, distant daytime objects, such as a sign, a faraway tree, or a building. Start with something stationary and avoid looking toward the Sun.
The view may be narrow, dim, or upside down. These limits are normal for a simple craft build, so use the telescope to compare how the image changes as the tube moves.
At night, it may be difficult to aim and focus the homemade tube on stars. For learning basic telescope facts for kids, explain how the lenses gather and magnify light, and let kids compare the handmade version with an astronomy telescope.
How can you keep the activity safe?
Keep the telescope pointed away from the Sun at all times. Looking through lenses at the Sun can cause serious, permanent eye damage.
An adult should handle scissors, craft knives, and any other cutting tools. Check that lenses are held firmly, and stop using the telescope if a lens cracks or comes loose.
Don't use the telescope to look at the Sun through clouds, sunglasses, or other ordinary filters. For nighttime observing, help children aim the tube away from bright lights and handle it gently.
When is a telescope kit a better choice?
Choose a kit if you want matched parts and a more complete activity without sourcing separate lenses and tubes. A basic craft telescope can teach lens placement, but its image may be hard to focus.
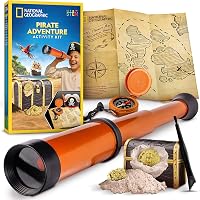
The Blue Marble National Geographic Pirate Telescope Adventure Activity includes a working spyglass and compass, along with a treasure dig activity, crafts, and a learning guide. It suits a child who may enjoy a themed outdoor activity as much as building.
For a broader comparison, see our best telescope kit for kids. You can also read What Is a Good Starter Telescope for Kids? to compare a craft build with a beginner astronomy telescope.
Can a digital tool help kids explore in other ways?
A digital microscope can give kids a different kind of close-up exploration, especially for looking at small objects and saving images. It doesn't replace a telescope for distant sky viewing.
The BMDSAE 2-in-1 Digital Microscope for Kid Handheld combines micro viewing with 10X landscape observing. Its built-in display stores photos and video, according to its listed features.
This option suits kids who like switching between small objects and distant scenery. For choosing an optical instrument around a child's age and interests, use [How Do I Pick a Telescope for My Kid?
What to Know](/how-do-i-pick-a-telescope-for-my-kid/).
What should you use for real astronomy?
Choose a beginner telescope made for astronomy if the goal is clearer views of the Moon and planets. A purpose-built model includes optics and support designed for repeated observing.
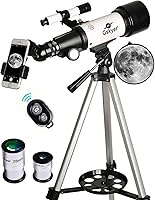
The Celestron Travel Scope 80mm Telescope Kit includes an 80mm refractor, 20mm and 10mm eyepieces, a tripod, a finderscope, and a backpack. It is designed for adults and kids to use together, and the setup needs no tools.
The parts each help with a different step: a tripod steadies the view, the finderscope helps aim, and the eyepieces provide different views. See our guide to telescope parts and accessories before choosing extra equipment.
How do you choose between building and buying?
Build a paper telescope for a low-cost lesson about lenses; choose a kit for a more ready-to-use activity or clearer observing. The right choice depends on whether the child is most interested in making, exploring, or astronomy.
A simple build works well when an adult can help with cutting and focusing, and the goal is experimentation. A spyglass activity kit adds crafts and exploration, while a beginner telescope is a better fit for family stargazing.
Keep the homemade scope pointed away from the Sun, and set realistic expectations for its image. If a child wants to see the Moon and planets more clearly, start with a telescope designed for astronomy and use it together.
Frequently asked questions
Can a child make a telescope at home?
Yes. With an adult, a child can build a simple viewing telescope from a paper tube and 2 convex lenses.
The image may be dim or blurry, and the tube needs careful adjustment.
Keep the activity for distant daytime objects, and never point homemade optics at the Sun.
What lenses do you need to make a simple telescope?
A basic refracting telescope uses 2 convex lenses with different focal lengths. The objective lens at the far end should have a longer focal length than the eyepiece near your eye.
Secure each lens in a tube, then slide the sections until a distant object comes into focus.
Is a homemade telescope safe for looking at the Sun?
No. Never look at or near the Sun through a homemade telescope, even briefly.
Concentrated sunlight can cause permanent eye injury.
Use the telescope only for distant objects away from the Sun, and choose a supervised solar-viewing activity with purpose-made equipment if you want to observe the Sun.